Part of Microsoft Office’s suite, Microsoft Publisher helps you design projects and publications that include both text and graphics. It provides user-friendly templates and customizable objects that make professional-looking graphic layout and typography as easy and intuitive as possible.
In this Microsoft Publisher tutorial, we’ll explain the app’s basic tools and features so that you can get started right away creating content like newsletters, brochures, business cards, and more.
Pick a template
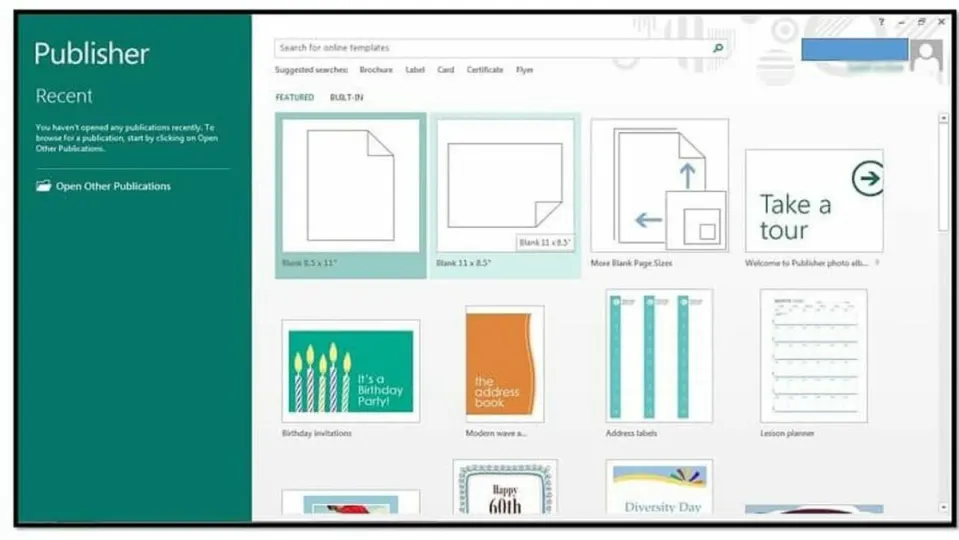
When you first open Microsoft Publisher, you’ll see the start screen displaying a list of common project styles that you can choose. You can also use the search bar to find a more customized template online.
Below the search bar, you can see the default page is showing the Featured templates. If you want to come up with your own layout, use one of the blank templates here on the Featured page.
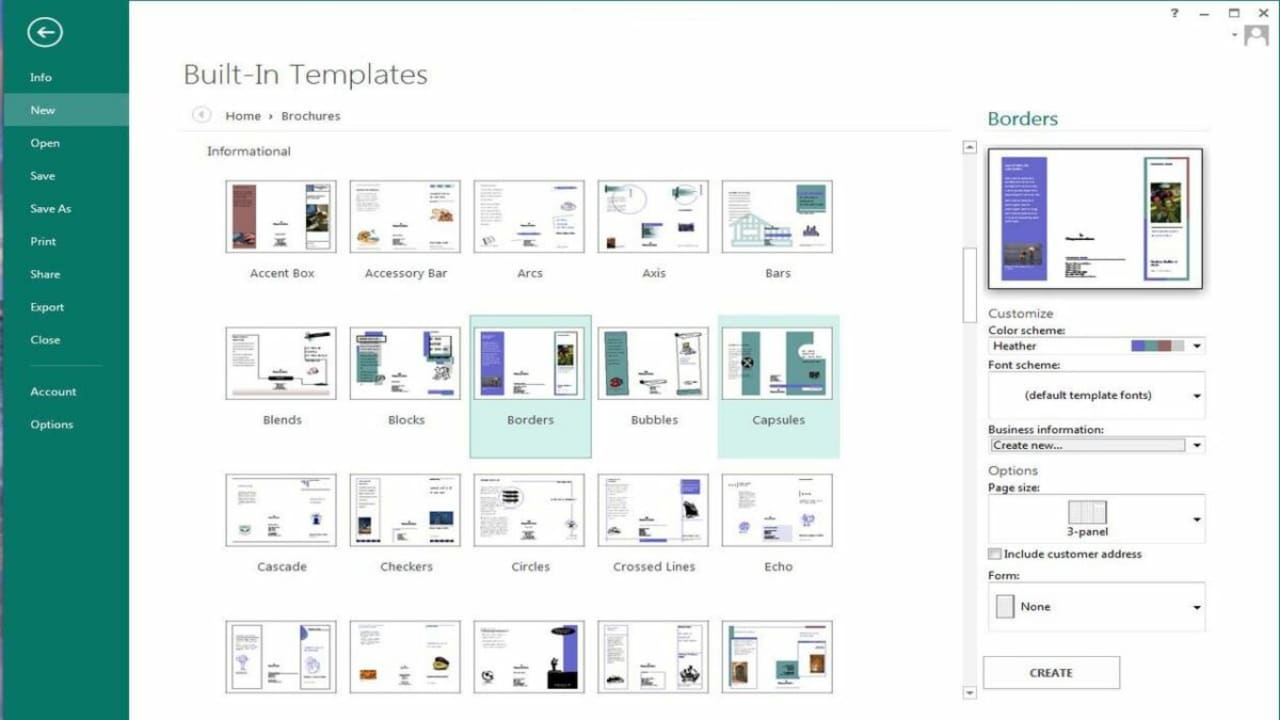
If you want to use a preset, click on the Built-In tab beside the Featured tab, and Publisher will show you a list of folders sorted by publication types, like Newsletters, Business cards, etc. Inside these folders, you’ll see thumbnails for all Publisher’s built-in template styles.
Select one that resembles the project you have in mind. You can customize the size, orientation, color palette, and font scheme in the right panel with a live thumbnail preview. Once you’re happy with the preview, click Create at the bottom right to load the still fully customizable template.
Get to know your workspace

Publisher’s basic layout looks almost exactly like the layout of any other Microsoft Office app. You’ll see your project in the main workspace at the center of the screen and the main ribbon toolbar across the top of the screen. The ribbon toolbar is where you’ll find all the most important tools to design, edit, and review your project.
One important difference in Publisher is that you’ll find a secondary toolbar on the left of your screen showing an overview of all the pages in your project. This Pages toolbar lets you select any page’s thumbnail to display that page in your main workspace.
How to use objects

Publisher treats everything you place on any page as individual objects. That includes text, pictures, shapes, borders, headings, etc. Any object can be arranged and edited separately from any other object, allowing you complete freedom to manipulate content.
Each object has its own border outline with white circles called handles on each corner. You can use the handles to edit or move any object by clicking and dragging. Most of Publisher’s templates are made of combinations of preset objects in preset locations.
How to add text boxes
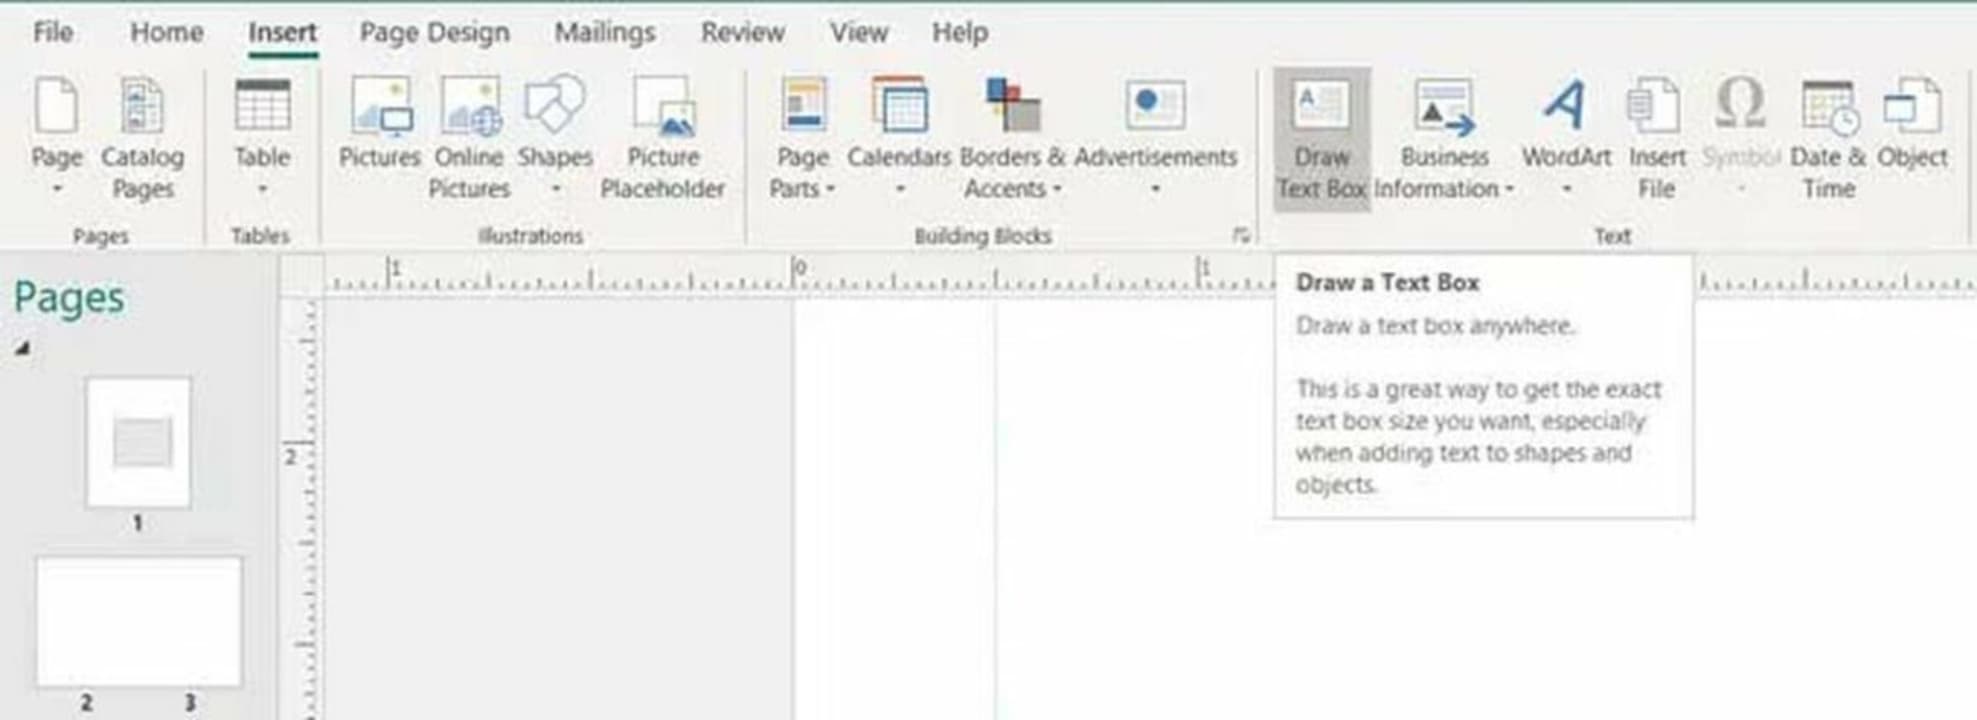
Most templates come with prearranged text box objects containing generic text. You can click on any existing text to select the text box object and add your own words.
If you want to insert your own text box, click on the Insert tab in the ribbon toolbar, and select Draw Text Box on the right side of your screen. Your cursor will show a crosshairs icon, which you can click and drag to draw your text box.
If you need to edit your text box, select it, and click the Format tab that appears in the ribbon toolbar to customize the font, size, alignment, and color.
How to add images
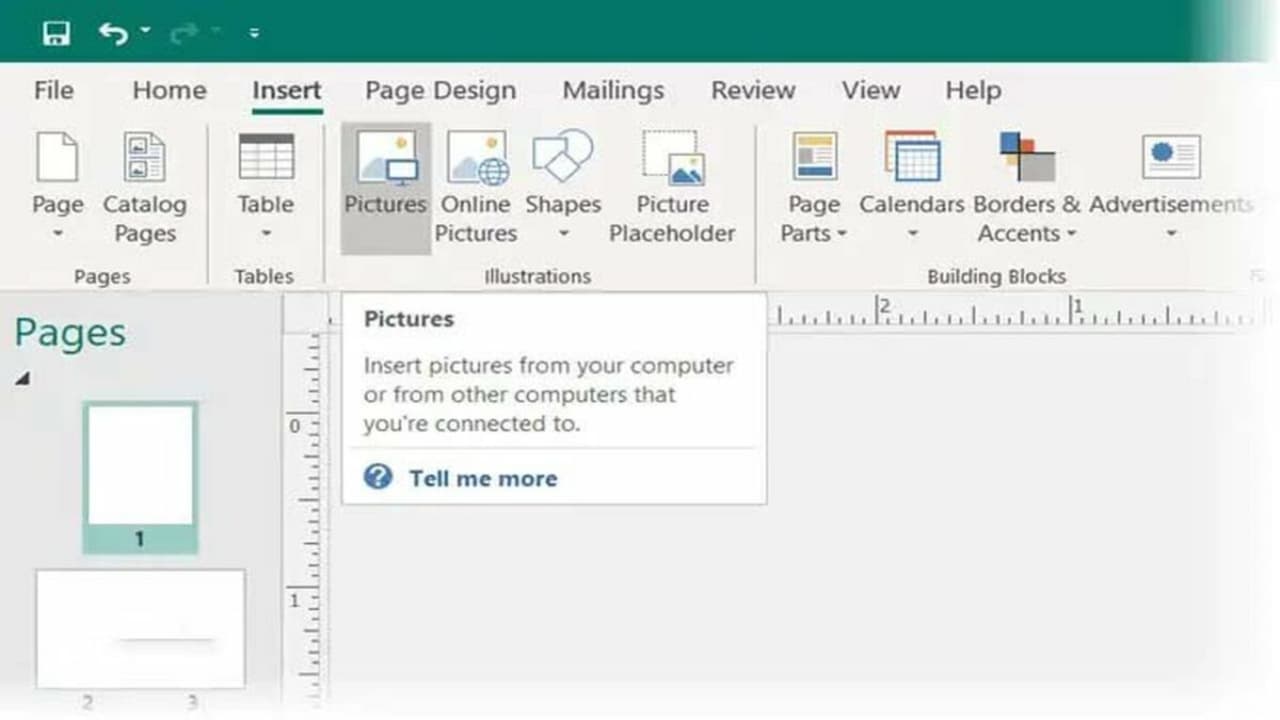
To add an image, click the ribbon’s Insert tab, and select Pictures. You’ll be able to choose any image from your computer, the cloud, or an internet search.
Once you’ve placed your image on any page in your project, you can select the image and click on the Format tab in the ribbon to display Publisher’s built-in image editing tools. These include:
• Corrections for brightness and contrast
• Recolor
• Picture border and effects
• Wrap text
• Crop
• Flip
• Rotate
• ResizeClick the tool you need, and then use the dropdown menus or the handles that will appear around your picture to make specific adjustments.
How to add shapes and other objects
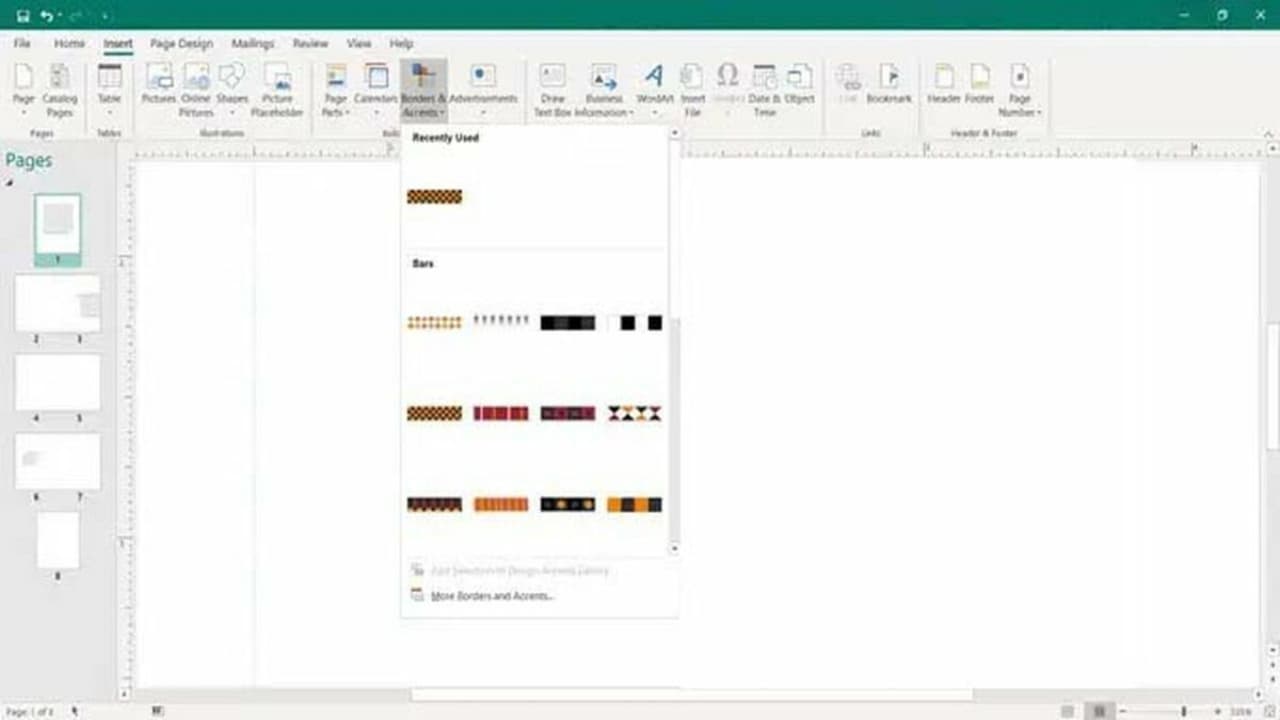
To the right of the Pictures button, you’ll find the Shapes button. This is where you can insert basic shapes into your project. These can come in handy to create logos and simple art.
To the right of the Shapes button are a few more pre-formatted elements that you can insert and modify to match your overall design. These building blocks include borders, calendars, WordArt, date and time boxes, quotes, headers, footers, etc.
When you insert one of these into your project, you can right-click on it and select Format Object from the popup menu to play with its colors, style, alignment, etc.
How to use Design Checker
Once you feel satisfied with your project’s layout, finish up by giving it a final automated inspection using Publisher’s Design Checker. You can find it by clicking File in the ribbon and then Info > Design Checker.
A menu will appear on the right side of your screen displaying a list of design or layout issues Design Checker found in your content. Click on any specific one to see its full explanation along with Publisher’s suggestions on what to change.
Save, export, and print your finished project
While you work, you can save your project regularly by pressing CTRL + S. Once you’re happy with your design, you can export your project to your favorite file format, such as PDF or HTML, by clicking on File > Export. You can also print your design by selecting File > Print.
Get started today by downloading and installing Microsoft Publisher. Want to test out another app? Check out these four alternatives to Microsoft Publisher.
